Crawl Space Drainage System Maintenance: Keep French Drains Flowing in Charleston
A crawl space drainage system only protects your home if it keeps working after it goes in. Around Charleston, that is the part most homeowners never hear about. Our water table sits high, summer storms dump inches of rain in an afternoon, and NOAA Tides and Currents recorded 17 high-tide flood days here during the 2023-24 meteorological year. A French drain and sump pump that handled all of that last year can silt up, clog, or quietly fail before the next hurricane season. French drain maintenance is not something you can set and forget; it demands a year-round routine built for high-water conditions.
This guide walks through a maintenance routine built for Lowcountry conditions, not a generic national checklist. If you already have a drain and sump system under your house, or you are weighing whether one is worth installing, here is how to keep it flowing year-round, step by step.
Why French Drain Maintenance Matters More in the Lowcountry
Charleston soil stays wet. More than 60% of U.S. homes have had water or moisture problems in their basement or crawl space, according to the American Society of Home Inspectors, and our tidal lots and flood-zone neighborhoods see more water pressure than most. A perimeter drain under your house moves water constantly, not just during storms.
That constant flow carries fine sand and silt, which is exactly what settles inside drain pipe and sump basins over time. Once water gets trapped under the house, it cannot drain out on its own; the system has to move it. A clogged French drain or a stuck sump pump float means standing water, and standing water feeds the humidity and musty smell that drift up into your living room.
If guests have mentioned that smell, and candles and air fresheners have not fixed it, a neglected drainage system is one of the first places worth checking. A drain that stopped flowing two years ago can keep the dirt under your house damp enough to smell, even when you never see a puddle.
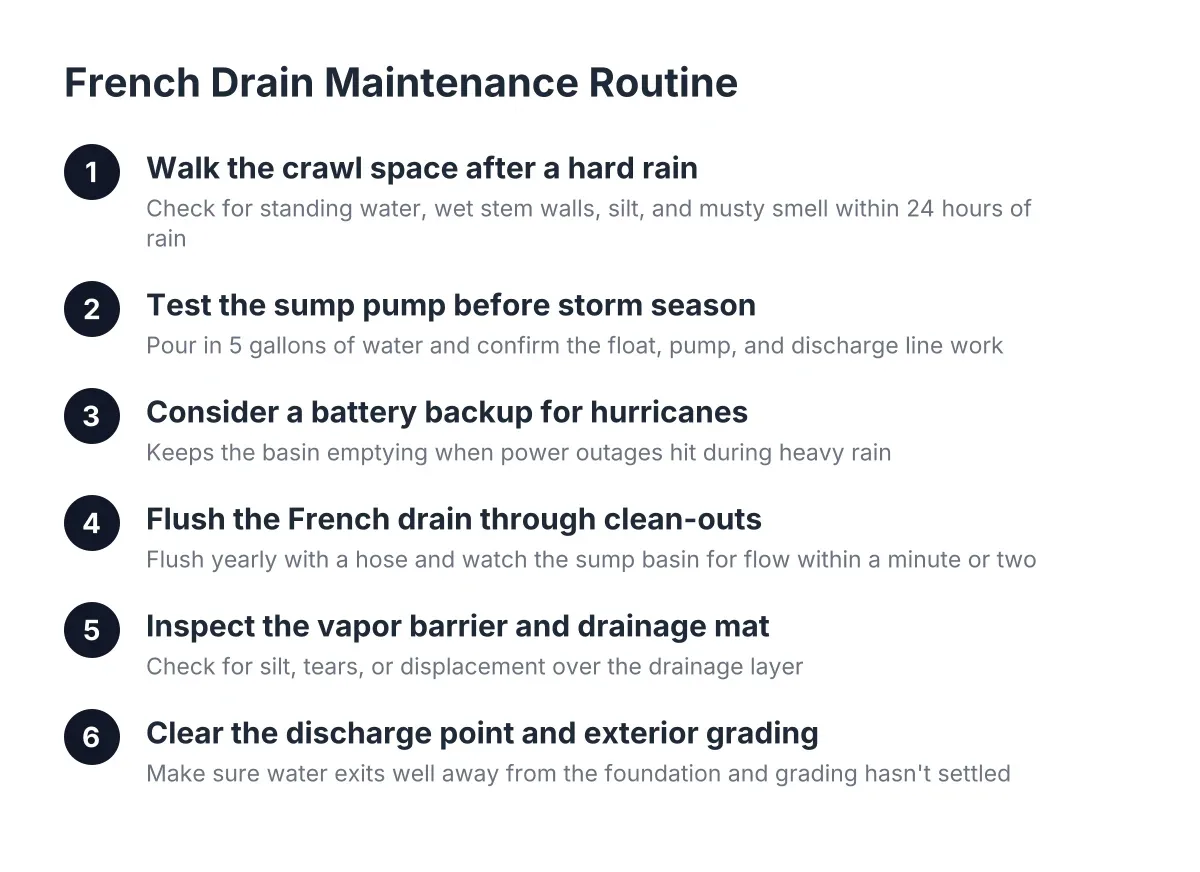
Step 1: Walk the Crawl Space After a Hard Rain
Pick a day within 24 hours of a heavy rain and look under the house with a good flashlight. You are checking whether the crawl space drainage system is actually doing its job when it matters, not on a dry afternoon in October.
Look for these specific signs:
- Standing water in the middle of the crawl space, away from the perimeter trench
- Wet streaks on the stem walls where water is entering above the drain line
- Mud or silt deposits on top of the vapor barrier
- A sump basin that is full but not pumping
- A musty smell that is stronger under the house than inside it
Water pooling in the middle of the floor usually means a grading problem, not a drain problem. Building America Solution Center (PNNL/DOE) notes that the crawl space dirt should be graded and sloped slightly toward the drain so water flows to the perimeter instead of pooling mid-floor. If your installer skipped that step, no amount of pump maintenance fixes it.
Step 2: Test the Sump Pump Before Storm Season
Test the pump every spring, before June storms arrive, and again before any named storm heads toward the coast. Pour a five-gallon bucket of water into the sump basin and watch what happens. The float should rise, the pump should kick on within seconds, and the basin should empty fast.
While you are there, check three things:
- The float moves freely and nothing in the basin blocks it
- The check valve holds, meaning water does not rush back into the basin when the pump shuts off
- The discharge line outside is clear and dumping water well away from the foundation
A pump that short-cycles, hums without pumping, or trips the breaker is telling you something. In a sealed, encapsulated crawl space, the sump pump is your emergency backstop; Building America Solution Center (PNNL/DOE) points out that a sealed crawl space traps water like a pool if a pipe bursts or flooding occurs, so the pump sits at the lowest point to eject it automatically. If that pump is dead when a tropical storm stalls over Charleston, you find out the hard way.
Consider a Battery Backup for Hurricane Season
Power outages and heavy rain arrive together here. A battery backup pump or a water-powered backup keeps the basin emptying when the grid goes down. For a home in a flood-prone neighborhood like those near the Ashley or Wando, a backup pump is cheap insurance compared to pumping out a flooded crawl space and replacing a soaked vapor barrier.
Step 3: Flush the French Drain Through Its Clean-Outs
A properly installed crawl space French drain system includes clean-out access points on both the perforated drain line and the solid discharge pipe. Those ports exist for this exact job. Once a year, open them and flush the line with a garden hose at full pressure. Watch the sump basin; if water from the far end of the drain reaches the basin within a minute or two, the line is flowing. Regular French drain maintenance keeps these lines open and clogs from taking hold.
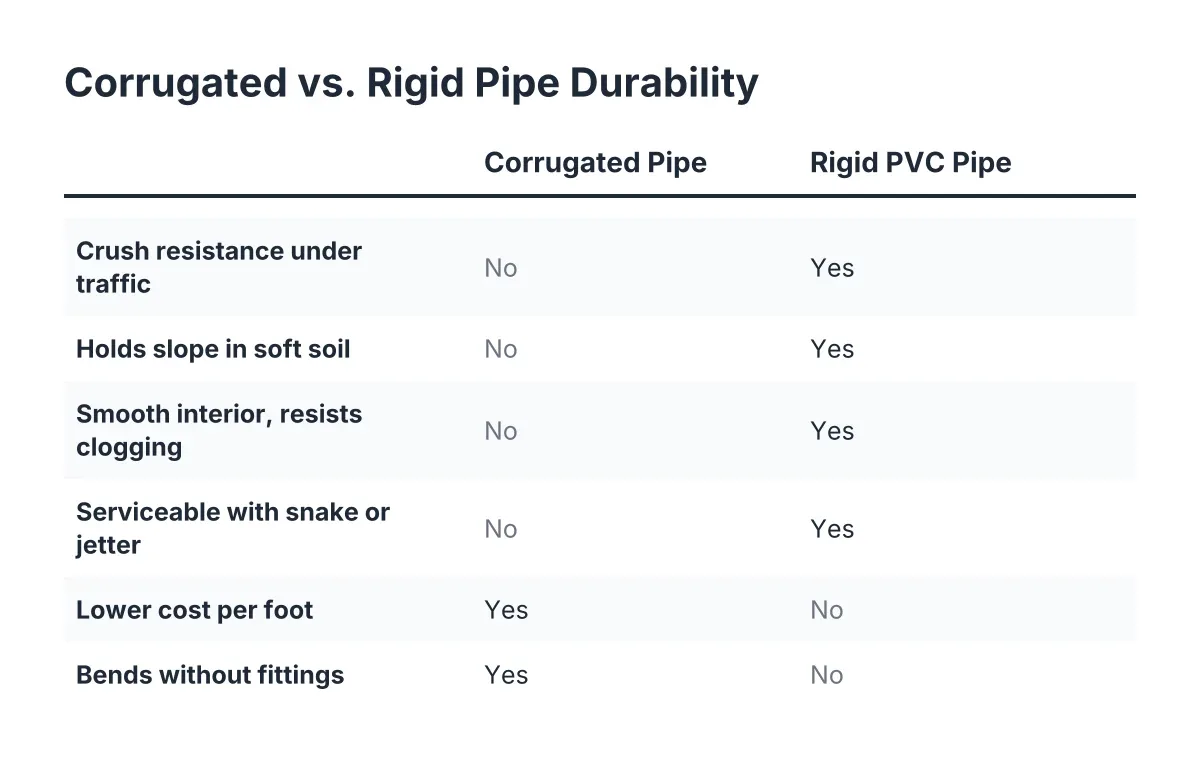
Slow flow or backed-up water means silt or roots have moved in. A plumber's jetter or a drain snake can clear most clogs through the clean-out. However, if your system was installed without clean-outs, clearing a clog can mean pulling up sections of vapor barrier and digging up the trench, which is a far bigger job. That is worth knowing before you buy a house with an existing system, and worth demanding if you are getting one installed in 2026.
French Drain Maintenance and Slope Considerations
The drain channel should slope continuously toward the sump basin so water moves by gravity instead of sitting in the trench. Trenches dug in soft Lowcountry soil can settle over time and create flat spots or bellies where water pools and silt collects. If flushing the line pushes water out of the gravel instead of into the basin, a settled section is the likely culprit, and that is a repair call, not a hose job.
Step 4: Inspect the Vapor Barrier and Drainage Mat
The vapor barrier and the drain system work as a team. Encapsulated crawl space floors typically sit on several inches of gravel beneath the plastic sheeting, with drainage piping running the foundation perimeter, according to Building America Solution Center (PNNL/DOE). Water that gets under the liner needs a clear path to the drain.
Therefore, check the barrier each time you are under the house. Look for seams that have pulled loose from the stem walls, punctures from stored items or service visits, and water sitting on top of the plastic. Water on top of the barrier cannot reach the drain below it; it just sits there and evaporates into the air your dehumidifier then has to handle. Re-tape seams, patch holes, and find out where that water came from.
Step 5: Clear the Discharge Point and Exterior Grading
The best interior drainage fails if the water has nowhere to go outside. Walk the discharge line to its outlet twice a year. Mulch, pine straw, and oyster-shell landscaping all migrate over discharge outlets in Charleston yards. Clear the opening, confirm the line slopes away from the house, and make sure the outlet is not dumping water right back against the foundation.
In addition, keep in mind that exterior drainage alone does not guarantee a dry crawl space. Water intrusion can come from multiple sources at once: groundwater rising from below, surface runoff, and plumbing leaks. An interior perimeter drain intercepts water entering under the foundation wall and channels it to the sump pump, as Building America Solution Center (PNNL/DOE) describes, and that interior line of defense is what keeps a high water table from winning.
Step 6: Put the System on a Seasonal Maintenance Schedule
Suppose you own a West Ashley home that was encapsulated three years ago, with a perimeter French drain, a sump pump, and a dehumidifier. In that scenario, a realistic annual routine looks like this: a spring pump test and drain flush before storm season, a mid-summer humidity check, and a post-hurricane-season walkthrough in November. As an estimate, budgeting a few hundred dollars a year for a professional maintenance visit, filter changes, and a pump check costs a fraction of replacing a failed pump and a moldy subfloor.
Many homeowners handle the visual checks themselves and bring in a crawl space specialist once a year for the full inspection. That split works well. A trained eye catches a settling trench, a failing check valve, or early mold growth that a flashlight pass from the hatch will miss.
Know What Drainage Maintenance Cannot Fix
A well-maintained crawl space drainage system solves standing water. It does not solve humidity. If your musty smell comes from damp air condensing under the house rather than liquid water, the fix is moisture control: a sealed vapor barrier, closed vents, and a dehumidifier, not a bigger pump. This is a common and expensive mix-up, so match the fix to the actual problem.
The honest approach is graduated. Start with an inspection that identifies where the water and the smell actually come from. Fix drainage if there is standing water, add encapsulation and dehumidification if humidity is the driver, and skip what you do not need. Crawl space drainage systems, vapor barriers, and dehumidifiers each handle a different piece of the moisture picture, and a Charleston home near the water table often needs more than one, but rarely needs everything at once.
If you find structural issues along the way, such as sagging floors, damaged beams, or widespread mold on the joists, bring in a professional before doing anything else. Drainage maintenance keeps a good system working; it cannot repair a foundation or remediate an established mold problem.
If you need crawl space encapsulation, Low Country Crawl Space Repair can help.
Prefer to talk it through? Call +18542013678 — a quick call is usually the fastest way to get a straight answer for your situation.